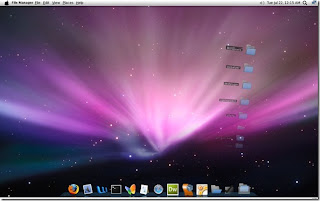
I was in my college laboratory yesterday and I got a nice tutorial from
this site about transforming Ubuntu to Mac OSX Leopard. Because I was started to get bored with Ubuntu Studio theme that I installed a few weeks ago, I decided to transform my Ubuntu to the new taste of theme.
As a matter of fact, I'm not PRO enough with the super advanced OS called Linux and it get worse coz I didn't mention that the tutorial I got is for transforming Ubuntu Hardy which is older than my current Ubuntu version (Jaunty). My notebook stuck into trouble while it was in the middle of transforming process. The screen was blinking after login to Gnome and I didn't know which package had caused this suck problem.
I'm not a type of a loser, so I backup all of my data, reinstalled my Ubuntu and the Mac theme. There as a package that looks suspicious and I didn't reinstalled it. Now I got Mac OSX Leopard running on my notebook.
Because I'm a good person (lol), I made this this tutorial so you don't fall into the same hole as me. Before we start the transformation you must download all of these files:
Once you finish download the files, follow the steps below:
1. Goal: Install the base of Mac OSX Leopard theme
1. I assume you downloaded the files to your home directory (/home/username). Extract Mac4Lin_modified_theme.tar.gz in that directory.
Go to System->Preferences->Appearance then you get this window:
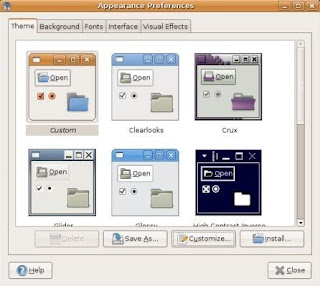 2. Click Install and select the Mac4Lin GTK theme (/home/username/Mac4Lin_v0.4/GTK Metacity Theme/Mac4Lin_GTK_v0.4.tar.gz).
Click Install again and select the Mac4Lin mouse cursor theme (/home/username/Mac4Lin_v0.4/GTK Cursor Theme/Mac4Lin_Cursors_v0.4.tar.gz). Select “Apply new themes” when prompted.
Next, click Install again and select the Mac4Lin icon theme (/home/username/Mac4Lin_Icons_modified.tar.gz). When prompted, select “Apply new themes“.
Don't worry if your window doesn't look like Mac yet.
Click Customize and choose Mac4Lin_GTK_v0.4. Go to the Window border tab, choose Mac4Lin_GTK_v0.4. Click Close
3. Ups...may be you're now wondering why the buttons looks so large and ugly. This is because the new Ubuntu version doesn't automatically hide the button icon so you must manually set the setting.
Press Alt+F2 buttons till you get this window:
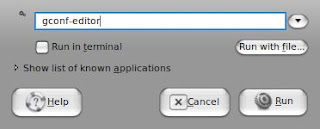 Type gconf-editor and click Run the you meet Gnome Configuration Editor window.
On the left panel, go to desktop->gnome->interface. Then on the right panel clear the sign at buttons_have_icons variable. This change will effect immediately. Your all buttons icon must have gone now.
4. Haha, don't be happy yet! Now we will change the window traffic light buttons to the left side. Still in Gnome Configuration Editor window (if you already close this window, back to step 7 to open it again), on the left panel go to the /->apps->metacity->general. Then on the right panel double click button_layout till you get this window:
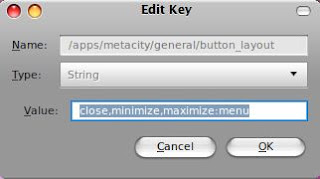 Change the Value from menu:minimize, maximize, close to close, minimize, maximize:menu.
5. Now, look at your top menu bar panel, we will transform this thing. Remove all the icon and applications on the left side of the top panel. Right-click on the icon and select ‘Remove from panel‘. You will left with something like this:
 On the right of the top panel, remove the logout icon. Still on the right hand side of the top panel, right click and select ‘Add to panel‘. Scroll down the list and add ‘Search for files‘. This will add the spotlight icon to the panel.
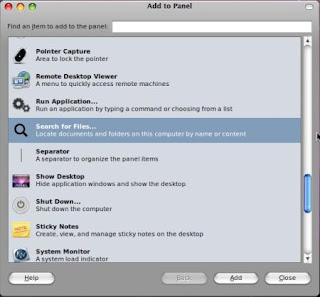 6. On the extreme left, right-click and select ‘Add to panel‘. Scroll down the list and add ‘Menu Bar‘. This will add the apple icon on the left.
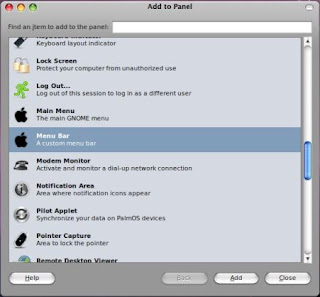 Actually the next step is to install global menu as to display the menu bar for each application just like the real OSX, but this package is not compatible with Ubuntu Jaunty and I think this package that caused my previous Ubuntu stop working. So we won't install this package.
2. Goal: Install the Dock
At first, we will edit APT repository to point to http://ppa.launchpad.net/. Here are the steps:
1. Open Terminal (Applications->Accessories->Terminal)
Type this command: gksu gedit /etc/apt/sources.list
Add the following lines to the end of files
deb http://ppa.launchpad.net/awn-testing/ubuntu jaunty main
deb-src http://ppa.launchpad.net/awn-testing/ubuntu jaunty main
2. Next we will update our new repository and install the dock package. Save and close the file then in your terminal, type:
sudo apt-get update
sudo apt-get install avant-window-navigator-trunk awn-manager-trunk awn-extras-applets-trunk
3. Once the installation is finished you can launch the AWN but before you do that, remove the bottom panel from the desktop first. Right click on the bottom panel and select “delete this panel”. Open AWN via Applications->Accessories->Avant Window Navigator. Once it is activated, you can simply drag and drop the applications into the dock.
The dock is running now but we will do some tweak to mimic the real OSX Leopard dock. Go to System->Preferences->AWN manager so you got this window:
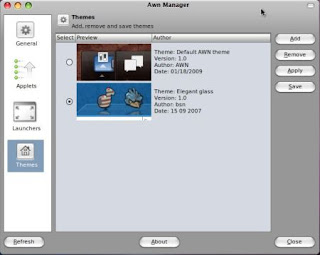 4. First, add the glass theme which you have downloaded. On the left panel, click on the Theme, On the right panel, click Add and navigate to the /home/username/Mac4Lin_v0.4 directory. Select the Elegant_glass.tgz file. Select the Elegant glass theme and click Apply. Next on the left, click on the Applet icon. On the right, scroll down to the Stacks Applet. Highlight it, then click Activate. This will add the Mac Leopard stack to your dock.
3. Goal: Install OSX Fonts.
Huff, let me guess. You're getting tired or bored with this tutorial. But it's not enough bro! Try to guess what will we do next. Hmm, I'm sure you can't guess it. Ok, do you realize that your fonts taste is still “Very Linux”? Aha...you got it now. Yes, we will change the font. So you must download the package first.
1. Open a terminal and type the following:
sudo apt-get install msttcorefonts
This will Install the Microsoft core fonts.
2. Next, copy the OSX fonts to the system fonts directory
cd /usr/share/fonts
sudo tar xvzf /home/username/Mac4Lin_v0.4/Fonts/OSX_Fonts.tar.gz
3. Configure the fonts
cd/
sudo tar xvjpf /home/username/Mac4Lin_v0.4/Fonts/fontconfig.tbz -C /etc/fonts
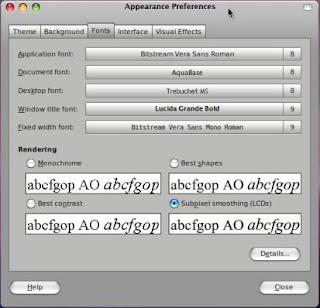
4. Open the Appearance window (System->Preferences->Appearance) and select Fonts tab. Select the following fonts according to the image below:
4. Goal: Transform the login screen
Easy bro...easy...it's almost done coz there are only 'sweet'-seventeen steps more to complete this transformation (haha).
1. Click on the Apple icon, go to System->Administration->Login Window. On the Local tab, click Add. Navigate to the path /filesystem/home/username/Mac4Lin_v0.4/GDM Theme and select the file Mac4Lin_GDM_v0.4.tar.gz. Check the box beside the newly installed theme to activate it.
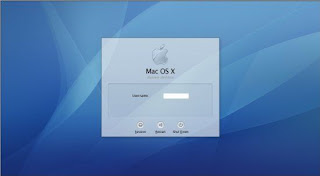
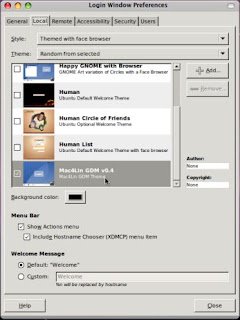 2. Underneath, there is a color selection field, select it and key in the number E5E5E5 into the color code field. Click Ok. Log out. You should see the login screen as the picture below:
5. Goal: Configure Usplash Screen
1. Usplash is the screen that you see when your computer is booting up. We are going to change it to show the white apple screen. Type in your terminal: sudo apt-get install startupmanager
Go to System->Administration->Start-Up Manager Go to Appearance tab.
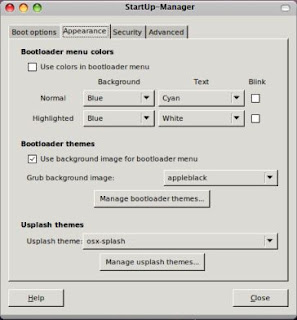 Click on the ‘Manage bootloader theme‘. Click Add and navigate to the file /filesystem/home/username/Mac4Lin_v0.4/GRUB Splash/appleblack.xpm.gz. Check the box “Use background image for bootloader menu” and select ‘appleblack”.
Next, click “Manage usplash theme”. Click Add and add the file /filesystem/home/username/Mac4Lin_v0.4/USplash Theme/osx-splash.so. Click OK. Select osx-splash from the dropdown box.
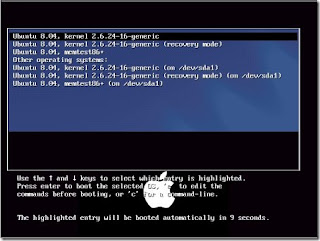
Now reboot. You should see the following images:
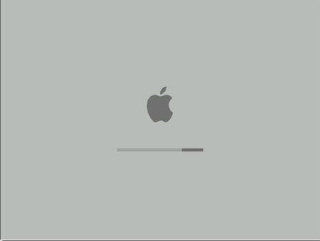
2. Cool hah??
6. Goal: Creating Dashboard effect.
Do you like desktop effects? If you do, then you must be happy to hear this. We will use a combination of Screenlets and Compiz widget plugin to achieve the dashboard effect.
1. Install Screenlets sudo apt-get install screenlets compizconfig-settings-manager
Go to System->Preferences->CompizConfig Settings Manager.
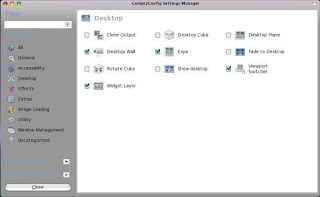
On the Left, click on Desktop. On the right, put a check beside ‘Widget layer’
2. Go to Accessories->Screenlets. Activate the widgets that you want to display. Right click on the widget and select ‘Properties’. Go to Options tab and select ‘Treat as widget’. Do this for all the widgets that you have activated.
3. You can now see your dashboard in action by pressing F9.
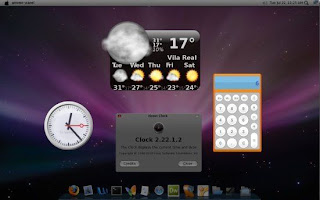
7. Done.
You have completed the transformation of your Ubuntu desktop to Mac OSX Leopard. Wait...wait...wait, don't forget to change you wallpaper. Using Archive manager, extract the Mac4Lin_Wallpapers_Part3_v0.4.tar.gz. Go to System->Preferences->Appearance. On the top, go to the Background tab. Click Add and select the Leopard wallpaper. (/home/username/Wallpapers/Leopard.jpg). Click Close to terminate the Appearance window.
Don't forget to leave a comment so I know that this post is useful to you.
Read more...


 RSS Feed (xml)
